Android Graphics Shapes

From Bill's Tutorials at btutor.com

Introduction

This is an abstract of part of “Start Programming Mobile Apps with Android Java” by Bill Tait which is available in Kindle or paperback format from the Amazon online book store.

It is assumed that you are familiar with an Android IDE such as Eclipse or Android Studio. If you are not, you should have a look at the tutorials on this site on Android Studio or read the book. If you are using Eclipse that is fine but it is recommended that you switch to Android Studio since the Eclipse plugin is no longer supported by Google.

It is also assumed that you have a basic knowledge of the Java language and its implementation in the Android framework. In other words, you should know how to write basic Android Java apps. If you do not have this knowledge you should consider readings a book, such as the one referred to above.

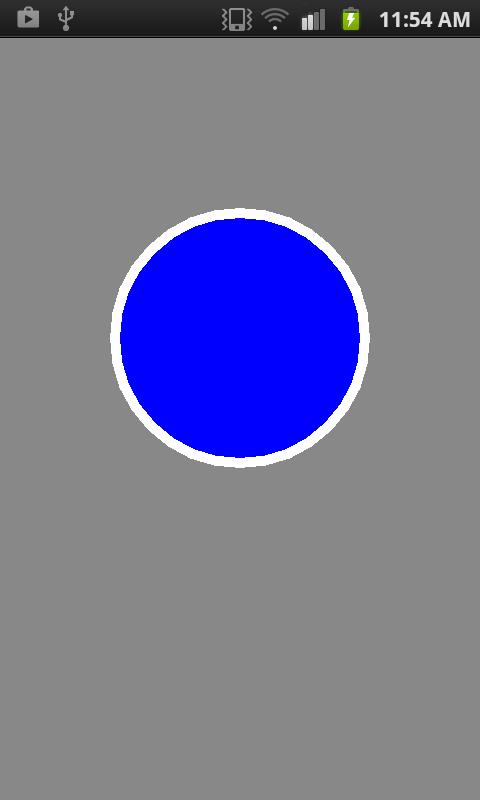
This tutorial is an introduction to Android Graphics so it covers only the very basic features including the graphics context, Paint and Canvas methods and essential Color concepts as well as some methods to draw simple shapes.


The Coordinate System

There are two ways to add graphics to Android apps. One is to draw them in some graphics package and import the graphics files into the app. This is quite straightforward and is best for static graphics features. The other way is to draw them directly on the screen with Java code. This is not so easy but it is best for dynamic effects and is the approach covered in this tutorial.

As on most computer screens, graphics coordinates are measured in from the left and down from the top – like text. The origin of the coordinate system is therefore at the top left corner of the screen. For a screen that has 480 pixels across by 800 vertically the mid-point of the screen is at x=240, y=400. In a mathematical system it would, of course, be at x=0, y=0.

What is more, the position of an object on the screen is usually defined in terms of its top left corner. So the “position” of a rectangle is the location of its top left corner. The same is true of a text character displayed as a graphic. The only exception is for circles, for which the position marker is its center.

All Java graphics methods require the developer to be able to program screen coordinates. This requires some skill and experience in spatial programming or a prior sketch to plot the graphics coordinates.


Colors

There are several ways to define a color in Android Java. The simplest is to use the color constants defined in the Color class, such as Color.RED and Color.YELLOW. These are very easy to use but they have a limited range. We can only have BLACK, BLUE, CYAN, DKGRAY, GRAY, GREEN, LTGRAY, MAGENTA, RED, TRANSPARENT, WHITE or YELLOW. Other methods that give more control over color are developed in later tutorials.


Shapes

In Android graphics, Paint methods are used to control the actual drawing process and Canvas methods determine what is drawn. The View object in which these are contained only provides the context and relates it to the Activity.

The View does have one useful graphics method to set the background color of the entire view,

view.setBackgroundColor(color) where color again represents an int color value. Here, view, refers to a View object, such as shapeView. However, the method is usually called inside the view object itself so we can use this.setBackgroundColor(color) or just setBackgroundColor(color).

There are several Paint methods including

paint.setStrokeWidth(width) where width is described by a float variable as a number of pixels. This sets the width of the next lines to be drawn.

paint.setColor(color) where color is an int variable representing the color value, such as Color.RED. This is a constant defined in the Color class which is actually an integer. Class constants are always written all in upper case to make it clear they are constants rather than variables.

paint.setStyle(style) where style is Paint.Style.STROKE or FILL. Note that Paint is a class name as is Stroke.

paint.setStrokeWidth(w) where w is the width of lines to be drawn.


Canvas methods are used to define what is drawn, including,

canvas.drawRect(x1, y1, x2, y2, paint) where x1,y1 are the coordinates of the top left corner of the rectangle and x2,y2 are the coordinates of the bottom right corner and paint is an object of the Paint class.

canvas.drawCircle( x, y, r, paint) which draws a circle centered on the point x, y and radius r.

canvas.drawLine(x1, y1, x2, y2, paint) which draws a line from x1, y1 to x2, y2 using the current value of paint.

Then there is the Path class. It has its own set of methods and a constructor Path(), which creates a new path.


Rectangles

Android graphics uses a Paint object to draw on a Canvas object within a View object. Both the Paint and Canvas classes provide methods for drawing. Both have to be declared as attributes of a View object, which is the context in which the graphics methods operate within an Activity. As an example, a very simple activity might be declared as follows:-

package com.androidjavaapps.shape;   // Must be changed to your own package name

import android.os.*;                            // the .* syntax includes all objects in the os package
import android.app.*;
import android.view.*;
import android.content.*;
import android.graphics.*;

public class MainActivity extends Activity {

ShapeView shapeView;

public void onCreate(Bundle savedInstanceState) {
super.onCreate(savedInstanceState);
shapeView=new ShapeView(this);
setContentView(shapeView);
}

public class ShapeView extends View{
Paint paint= new Paint();

public ShapeView(Context context){
super(context);
}

public void onDraw(Canvas canvas){
float width=8;
float x=200,y=100, a=120, b=160;
this.setBackgroundColor(Color.YELLOW);
paint.setStrokeWidth(width);
paint.setColor(Color.BLACK);
paint.setStyle(Paint.Style.STROKE);
canvas.drawRect(x, y, x+a,y+b, paint);
paint.setColor(Color.RED);
paint.setStyle(Paint.Style.FILL);
canvas.drawRect(x, y, x+a,y+b, paint);
}
}
}

Here the View class is called ShapeView and its instance object is shapeView. The Paint object is just called paint. We normally use the class name with a lower case initial letter for object names when there is only one of them. The Canvas object is already declared in the inherited View class so it only has to be copied to the onDraw() method as its argument. The onDraw() method is, of course, also inherited from the View super class and does all the drawing on the canvas..

The variables x and y refer to the position of the rectangle and the variables, a and b, refer to its width and height.

The onDraw() method is called regularly by Android and draws directly to the screen. In this example it initializes variabkes for the width of lines and the x and y position coordinates that will be used to draw a rectangle, and its width a and height b. First it sets the background color to yellow with the View method. Then it sets the line width, the line color and the style to STROKE and draws an outline rectangle. Then it sets the color to red, the style to FILL and draws a filled rectangle. So we should have a red rectangle with a black outline around it.

The result of executing this code is a red rectangle drawn on a yellow background as shown in Figure 1. This is on a smartphone with a screen resolution of 480 by 800 pixels.

Rectangle shape  
Figure 1. The Shape app to draw a rectangle.
Since we have drawn the rectangle at a fixed position and with a fixed size it will appear differently on screens of different sizes. This problem of scaling is dealt with in the next tutorial. Meanwhile we will look at three more graphics shapes, circles, lines and paths.

Circles

The canvas method to draw a circle centered on the point, x,y, and of radius r, is

canvas.drawCircle( x, y, r, paint)

We can replace the rectangle in the previous example with a circle by rewriting the onDraw() method to be

public void onDraw(Canvas canvas) {
float width = 20;
float x = 240, y = 300, r = 120;
this.setBackgroundColor(Color.GRAY);
paint.setStrokeWidth(width);
paint.setColor(Color.WHITE);
paint.setStyle(Paint.Style.STROKE);
canvas.drawCircle(x, y, r, paint);
paint.setColor(Color.BLUE);
paint.setStyle(Paint.Style.FILL);
canvas.drawCircle(x, y, r, paint);
}

This time we have changed the x position to the center of a 480 pixel screen. We have also changed the colors and the width of the outline stroke. This produces the display shown in Figure 2.

Circle shape
Figure 2. A blue circle with a white outline on a gray background.

Lines

We can draw a single line using the method,

canvas.drawLine(x1, y1, x2, y2, paint)

This draws a line from x1, y1 to x2, y2 using the current value of paint.

Here is an example of an onDraw() method to draw a triangle,

public void onDraw(Canvas canvas) {
float width = 12;
float x=160, y=280;
this.setBackgroundColor(Color.CYAN);
paint.setStrokeWidth(width);
paint.setColor(Color.BLACK);
paint.setStyle(Paint.Style.STROKE);
canvas.drawLine(x, y, x+80, y-160, paint);
canvas.drawLine(x+80,y-160, x+160,y,paint);
canvas.drawLine(x+160,y,x,y,paint);
}

It uses only one starting set of coordinates, x and y and continually adds to these to get three joined up lines. So the triangle is actually relative to the starting point and the triangle has a height of 160 pixels and a width of 160 pixels. The result is shown in Figure 3.

Triangle shape
Figure 3. Black lines forming a triangle on a cyan background.